

UI Mode
Tapsmith’s UI mode is a browser-based interactive test runner with built-in MCP integration. Like watch mode, it keeps the daemon, device, and agent alive across re-runs, bringing re-run times down to roughly 1-2 seconds.
Starting UI mode
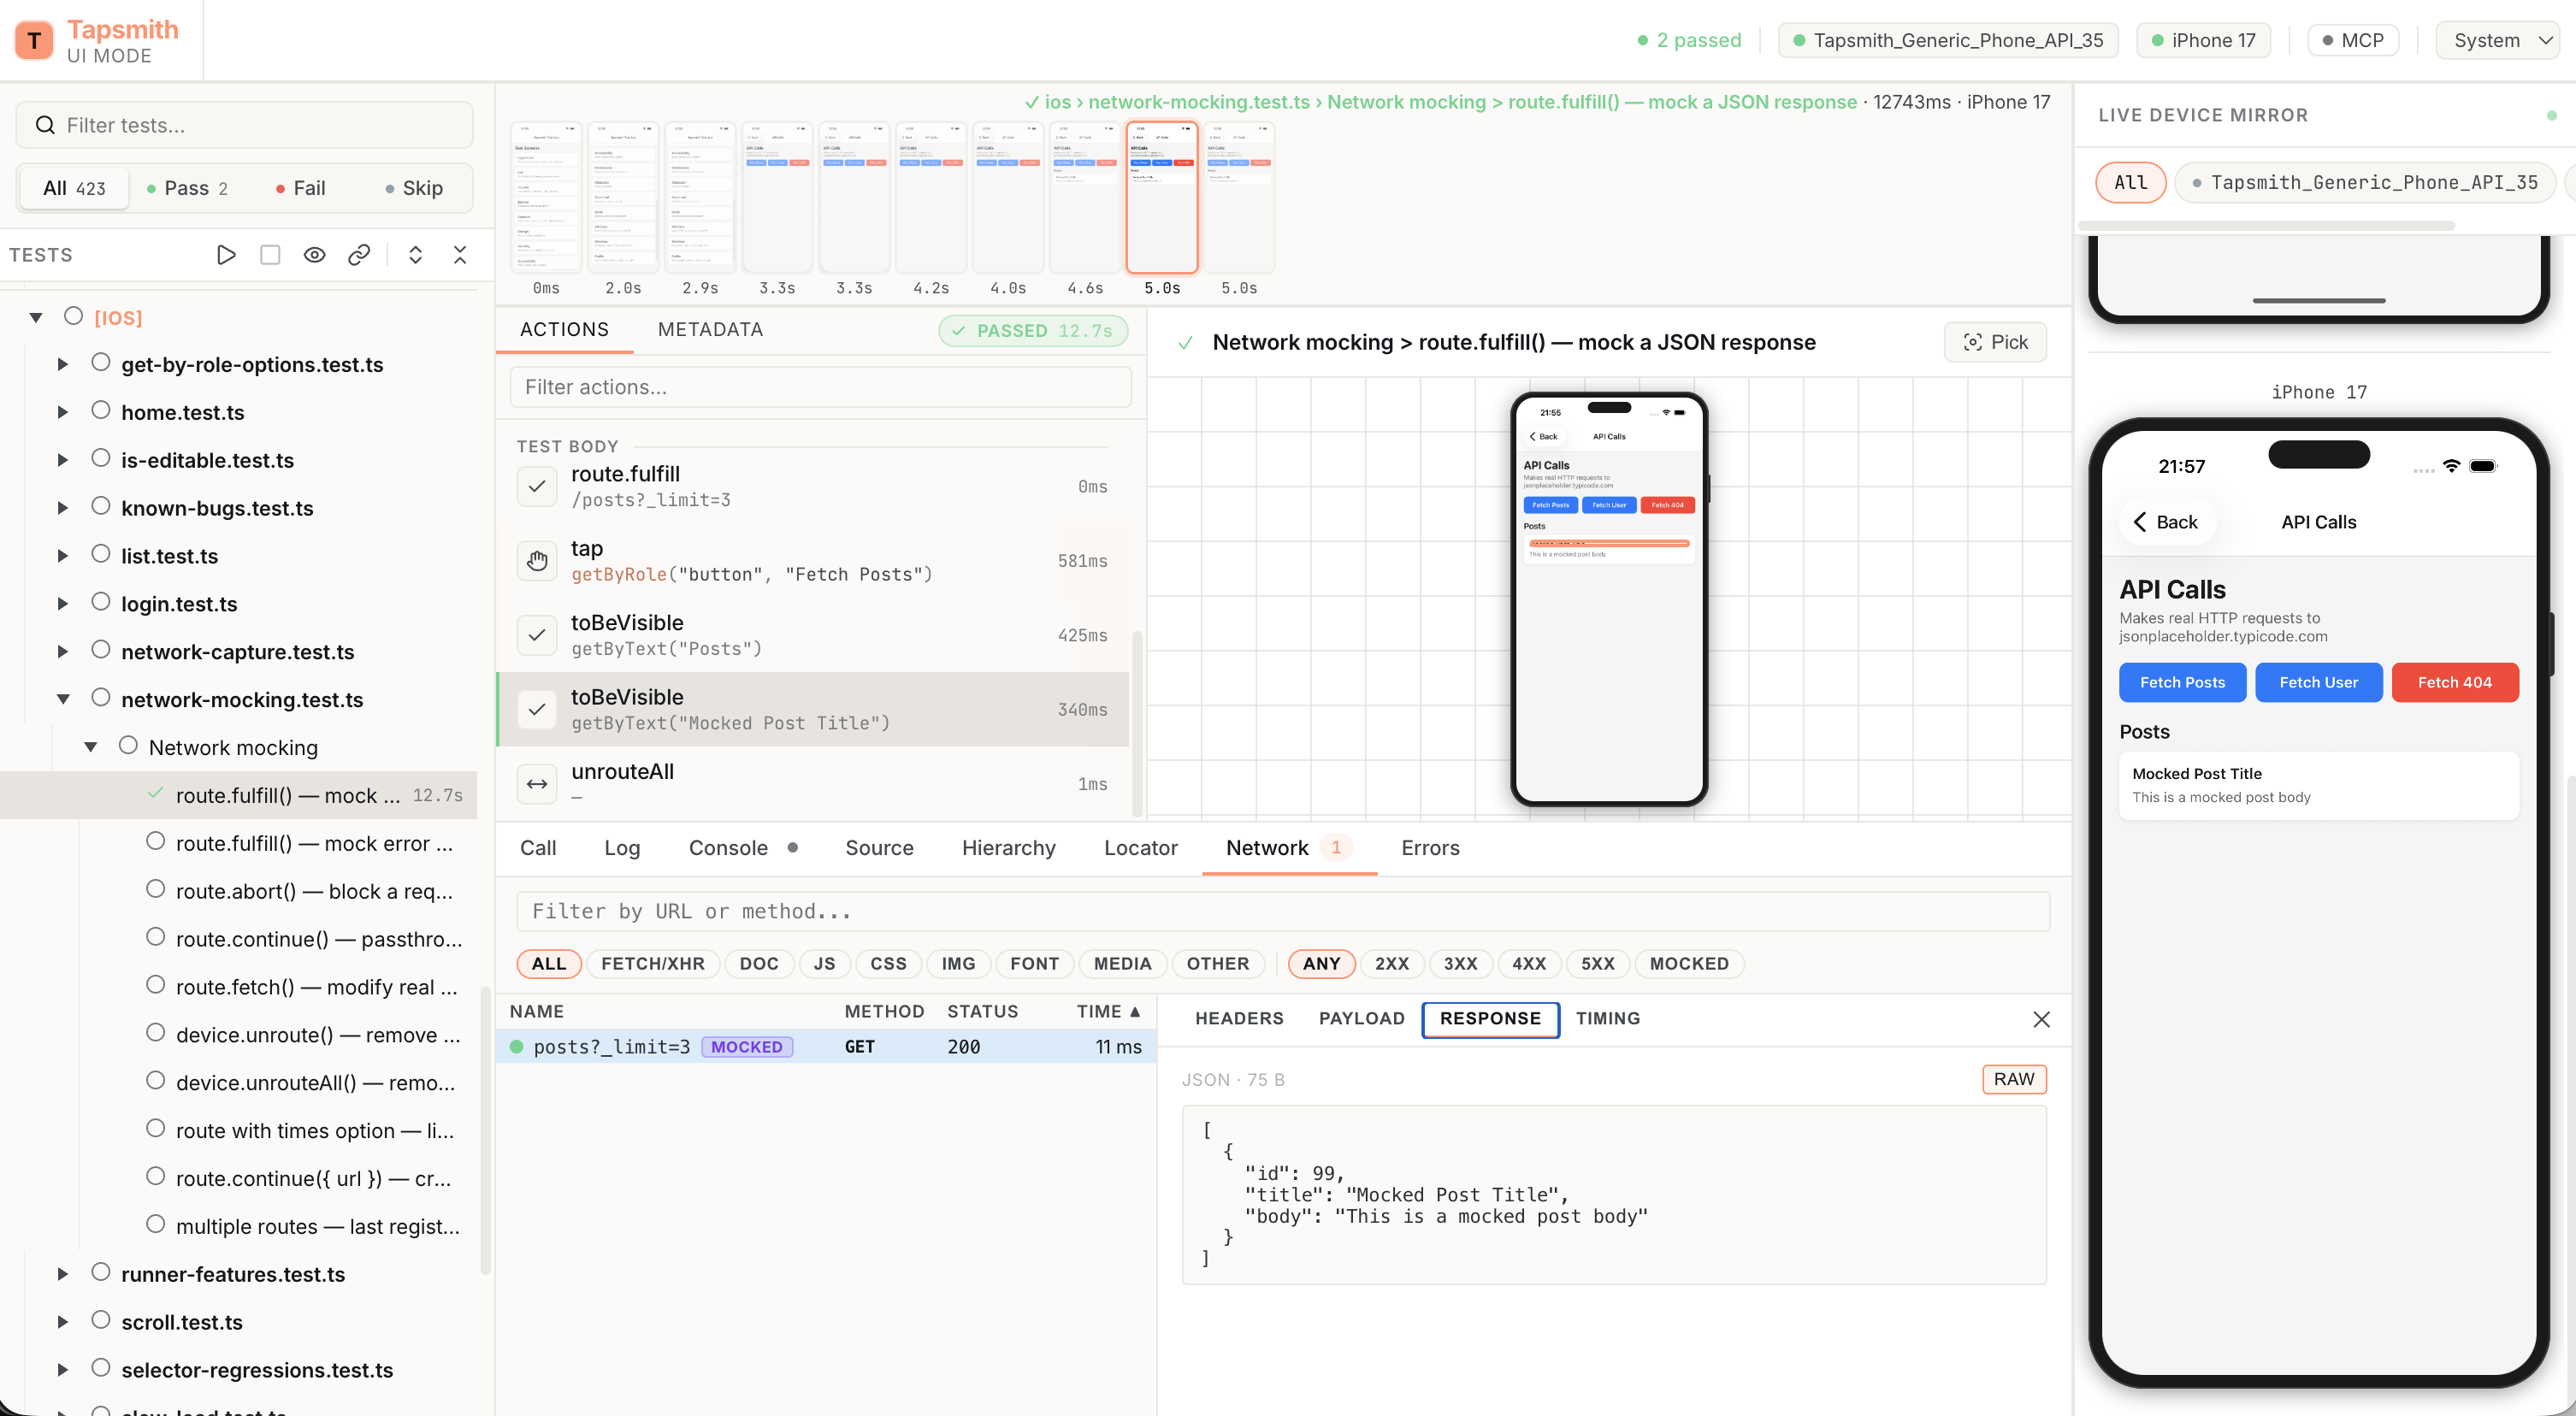
Section titled “Starting UI mode”npx tapsmith test --uiThis opens an interactive web-based test runner in your browser. The UI server picks an available port automatically and prints the URL to the terminal.
To set a specific port:
npx tapsmith test --ui --ui-port 8080Features
Section titled “Features”The UI provides:
- Interactive test tree — tests are listed in a tree structure, grouped by file and
describeblock. When projects are configured, tests are grouped by project first. - Click to run — click any test, file, or project node to run it. You can also run the entire suite.
- Live progress — test results stream into the UI in real time as tests execute. You see pass/fail status, duration, and error details as each test completes.
- Result browsing — after a run, browse results with error messages, stack traces, screenshots, and trace data inline.
- Watch mode toggle — toggle file-level watching from the UI. When a file’s watch is enabled, it re-runs automatically on save (the same mechanism as
--watchmode). - Interactive device mirror — the UI streams the device screen and lets you drive it with your mouse and keyboard: click to tap, drag to swipe/scroll, click-and-hold to long-press, and type to enter text. See Interacting with the device mirror.
Interacting with the device mirror
Section titled “Interacting with the device mirror”The live device mirror is interactive — drive the device straight from the browser, with no attached debugger or window-switching:
- Tap — click anywhere on the mirror.
- Swipe / scroll — drag with the mouse; the screen tracks the drag.
- Long-press — click and hold.
- Text input — the mirror takes keyboard focus on click; type to enter text (Enter and Backspace are forwarded too).
These drive the same coordinate gestures exposed in the SDK (device.tapXY, device.dragXY, device.longPressXY, device.inputText — see the API reference).
Lock toggle. A lock control in the mirror header governs interactivity. It’s unlocked (interactive) by default and auto-locks while a run is active so your input can’t interfere with a running test. You can override it at any time — an explicit lock sticks until you unlock, while an unlock during a run lasts only for that run.
Picking locators from the mirror
Section titled “Picking locators from the mirror”The pick button (crosshair icon) in the mirror header turns the mirror into an element picker. While picking, clicks are not forwarded to the device — instead:
- Hover highlights the element under the cursor.
- Click selects the element and opens the Locator tab with suggested locators (role, text, test ID, …). Suggestions are checked for uniqueness against the device’s current UI, and match highlights draw directly on the mirror.
- Editing the locator in the Locator tab updates the match highlights live, so you can refine a selector against the real app state without running a test.
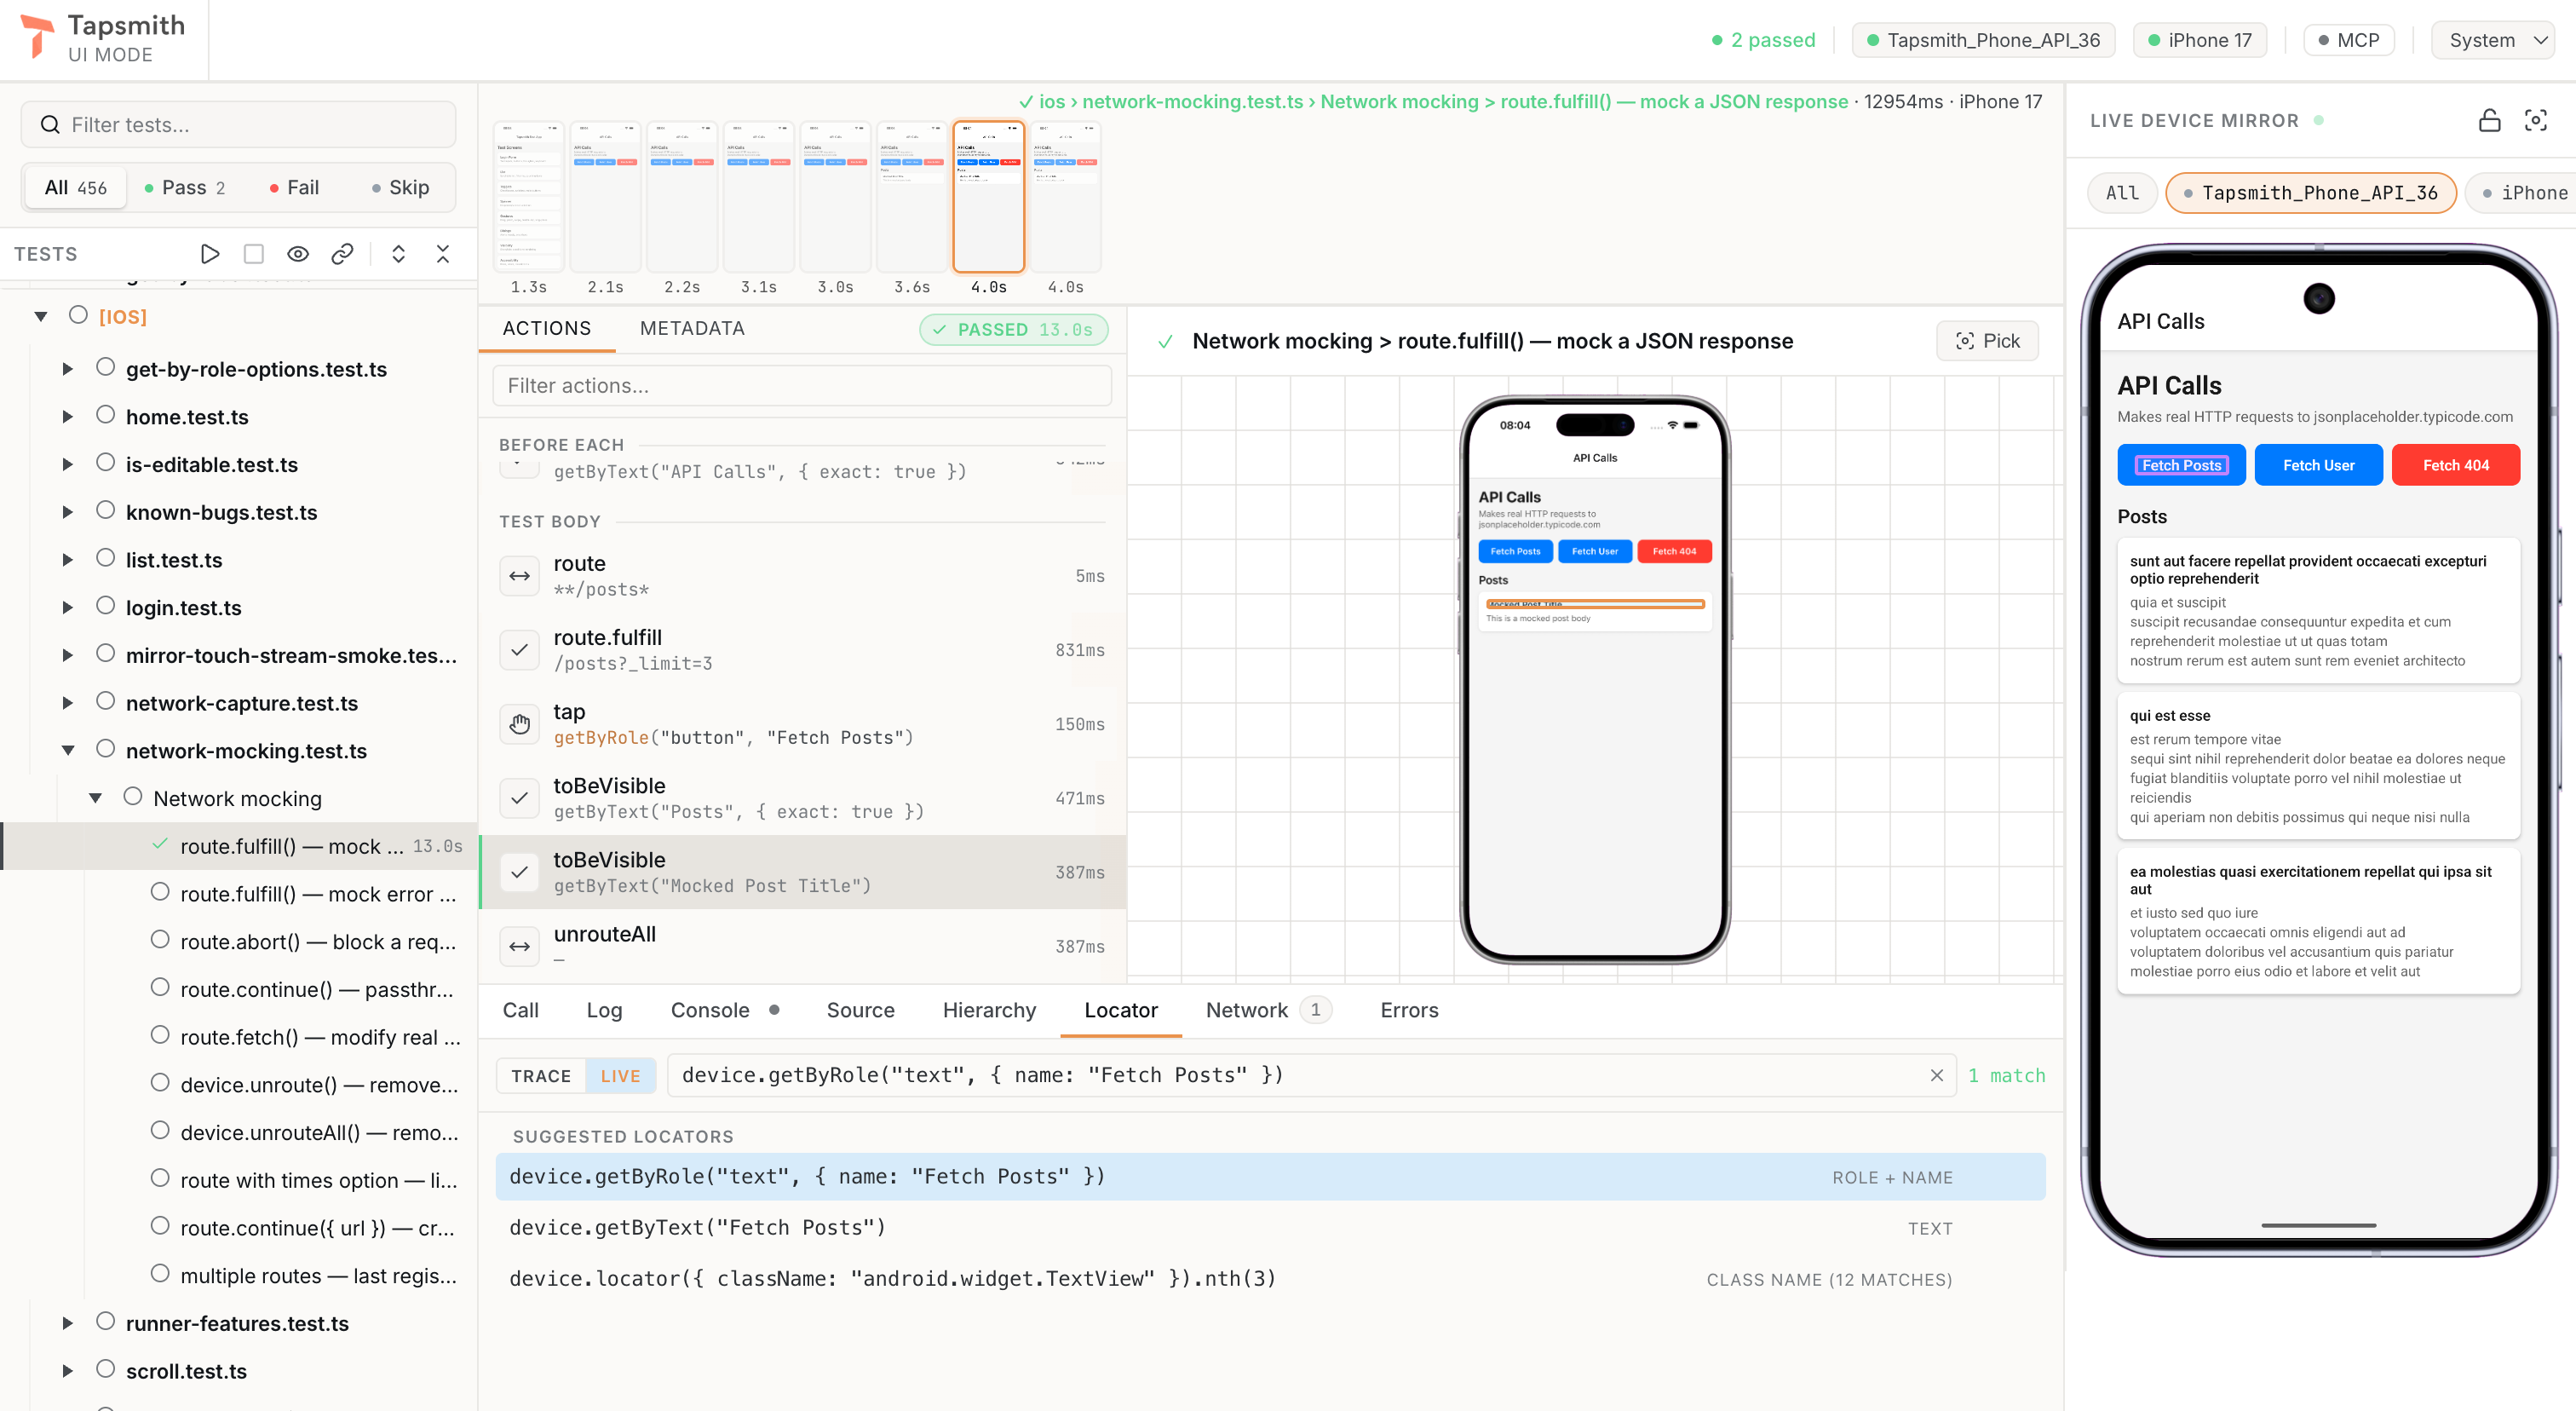
The Locator tab has a Trace | Live toggle showing which hierarchy it is bound to: Trace matches against the selected action’s captured hierarchy (highlights draw on the screenshot), Live matches against the device’s current UI (highlights draw on the mirror). Picking sets the source automatically — the toggle lets you flip a locator between the two without re-picking. Switching to Live takes a fresh snapshot of the device UI.
Picking works even while the mirror is locked (it’s read-only), and it works against whatever is on screen: drive the app to the screen you care about, then pick. In multi-device mode, the picker targets the device tab you’re viewing (it’s unavailable in the “All” grid view).
MCP integration
Section titled “MCP integration”The UI server exposes a Streamable HTTP MCP endpoint that AI coding agents (Claude Code, Cursor, Codex, etc.) can connect to. This gives agents 16 tools for test discovery, execution, result browsing, device interaction, and watch mode control — all sharing the same session as the UI.
To connect an agent:
claude mcp add tapsmith --transport http http://localhost:<port>/mcpBoth the UI user and the MCP agent share the same test session. Runs triggered by either side appear in the UI, and mutual exclusion ensures only one test run happens at a time.
See MCP Server for the full list of tools and usage patterns.
Multi-project support
Section titled “Multi-project support”When your config defines multiple projects, the UI groups tests by project name. Each project routes to its own device (Android emulator, iOS simulator, physical device, etc.).
import { defineConfig } from "tapsmith";
export default defineConfig({  projects: [    {      name: "Pixel 6",      use: {        platform: "android",        avd: "Pixel_6_API_34",        apk: "./android/app-debug.apk",        launchEmulators: true,      },    },    {      name: "iPhone 16",      use: {        platform: "ios",        simulator: "iPhone 16",        app: "./ios/MyApp.app",      },    },  ],});
Running a test from the “Pixel 6” project routes it to the Android emulator; running one from “iPhone 16” routes it to the iOS simulator. The UI handles this routing transparently.
Multi-worker UI
Section titled “Multi-worker UI”When workers > 1, the UI server initializes persistent worker processes (one per device), the same way watch mode does. Files are dispatched across workers in parallel, and per-worker device screens are displayed in the UI.
npx tapsmith test --ui --workers 4Mutual exclusion
Section titled “Mutual exclusion”Only one test run can be active at a time, whether triggered from the UI or from an MCP agent. If you click “Run” in the UI while an MCP agent is already running tests, the run is queued. Both sides see the same results.